User Tools
chromebooks:openvpn
This is an old revision of the document!
Table of Contents
Configuring ChromeOS OpenVPN with PFSense
PFSense Certificates
Create CA
- Login to PFsense
- go to System → Certificate Manager
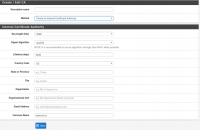
- With the CA's tab selected click on +Add
- Change method to Create an internal Certificate Authority
- Fill out the remaining fields with your details
- Click on Save
- Click on Export CA (blue star seal icon)
- Save the CA certificate to a secure location we will need it later
Create Server Cert
- While in System → Certificate Manager click on the Certificates tab
- Click on the +Add button
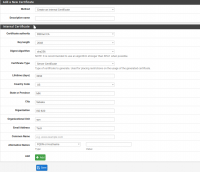
- Change method to Create internal Certificate
- Set the Certificate Authority to the CA you created in the previous section
- Change the Certificate Type to Server Certificate
- Fill out the remaining fields
- Finally click on Save
OpenVPN Server Setup
- Go to VPN → OpenVPN
- While on the Servers tab click on the +Add button
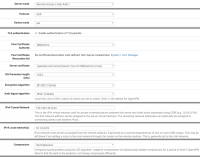
- Change Server Mode to Remote Access (User Auth)
- Change Protocol to UDP
- Change Device mode to tun
- Uncheck the box for Enable authentication for TLS Packets
- Under Peer Certificate Authority select the CA we created in the first section
- Under Server Certificate select the server certificate we created
- Change the Encryption Algorithm to BF-CBC (128 bit)
- Verify Auth Digest is set to SHA1 (160-bit)
- Under IPv4 Tunnel Network enter a unused network like 192.168.132.0/24
- Under IPv4 Local Network enter the network of your local LAN network
- Verify Compression is set to No Prefernce
- Finally click on Save
Create Users
- Go to System → User Manager
- Under the Users tab click on +Add
- Enter a Username and Password
- Click on Save
- Remember the username and password we will use them to configure the openvpn client on the ChromeOS device
chromebooks/openvpn.1481738146.txt.gz · Last modified: 2016/12/14 11:55 by tschulz


